Rocket Smartphone APRS Payload

Greg, N4KGL and I worked on a joint project to build and launch an APRS rocket payload. We finally got to launch it yesterday after a small delay due to field availability. It included the Mobilinkd bluetooth adapter, Baofeng Uv-5r HT and a eBay special android smartphone (appropriately from “Boost”).

Our goals were to:

  1. Have a successful launch and recover (of course!)
  2. Use APRS for tracking using stock Ham radio equipment and smartphone
  3. Use the on-board smartphone sensors to record audio and accelerometer data
  4. Map ground track using My Tracks for further analysis

Ground Station:

Note: You can view the Google Doc prepared for this flight with more detail.

The ground station was connected via 802.11g while the rocket was sitting on the launcher. I was able to control the phone screen through VNC and start the audio recording, Sensor logger, APRS and My tracks while it was sitting on the pad waiting for launch. That capability was instrumental in starting and checking all the services prior to launch.

Field conditions were excellent, although it was a little windy at times and very hot. Greg prepared the rocket while I prepared the ground station and prepped the payload. Greg decided to try out a new rocket motor that he had never used before. It was a disposable J425R-14A high powered rocket motor.  It performed flawlessly from start to finish and sounded awesome!

I was quite surprised in how the phone GPS performed. It lost GPS fix during the accent phase but quickly reacquired lock after chute deployment. I chose My Tracks to do the GPS logging because of the logging rate and it integrates well with other GPS software. I am sure there is something better/faster but this seemed to work well for this launch.

Data Sets:

Please visit Greg’s post for more pictures and info.


Video of Launch:  The second half of the video is of smartphone audio synchronized with video, very cool!


Satgazing – New Hobby, New Word?

A series of cool and clear moonless nights opened up a whole new world to me recently. One that has been there for years I just never bothered to notice. Excellent outdoor conditions prompted me to do some “stargazing”  from my backyard about an hour after sunset. Lying there and looking up I see a fast moving object moving from north to south. Of course I knew it was a satellite of some kind, I have seen the International Space Station plenty of times. A few minutes later another, then another and another! Some from East to West, North to South and from all different directions. I was up to nine confirmed sightings.

I was definitely curious about what objects I witnessed streaking across the sky. A little bit of “Googling” brought me to heavens-above.com. It has everything you need to start “Satgazing”, such as star charts, printable schedules, magnitude filter and so on.  They also have a mobile friendly version that will use the location from your smartphone and present you with a real-time star chart. A must have utility for my next satgazing opportunity!

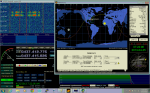
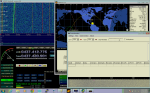
Fortunately the next night was just the same weather-wise. Shortly after sunset with my smartphone in hand and the heavens-above website on the ready I started watching. Within ten minutes I saw my first object streaking across the sky, it was a Cosmos 2322 Rocket. The mobile version gave a magnitude of 2.2 which was very easily viewed by the naked eye. The launch date for the rocket was October 31, 1995. Another object went streaking across the darkening night sky. A quick look on the phone revealed it was the Cosmos 1937 Rocket.  The process continued: I would see an object, check the phone or check the phone and wait for the object. I tallied over fifteen sightings in all, more than I expected to be able to see. I also witnessed a few objects that were not listed on the app. One such object produced a few quick flashes in succession that made me wonder if I was seeing things. I am still not sure what that was but most likely an object that was spinning along with its orbit. It might take some digging into different TLEs  and using my satellite tracking software to figure those out.

I became very curious to find out the oldest object I could still see. It turns out the oldest floating space debris I saw that night was the Atlas Centaur 2  ID: 1963-047A. It was launched on November 27,1963 19:03 (UTC).  “Wow, I didn’t know this old stuff was still orbiting the Earth!”. I did a quick search and found that the oldest object still orbiting Earth is the Vanguard-1 Satellite, it was launched on March 17, 1958 at 12:15 UTC. I would not have guessed that the fourth artificial satellite to ever be launched was still orbiting the earth!

Recently I have been so caught up in listening to different cubesats that I never really bothered to take a close look at what was actually visible in the sky.  So, for those that are curious, pick a clear moonless night and begin watching shortly after sunset. You will be amazed at how many man-made objects are still floating by during the night sky.

For fun: Google “satgazing”   — At the time of this writing only 299 hits. If the word takes off I want credit… 🙂

Credit: Wikipedia

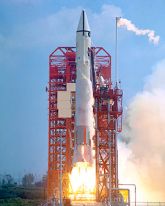
Atlas Centaur Rocket

Also check out this interesting history of the Atlas Centaur rocket and the groundbreaking reasearch!


Credit: Wikipedia

Vanguard 1 – The oldest Satellite still in orbit

Merry Christmas and a Happy New Year!

From our Family to yours:

We hope you have a wonderful Christmas and a blessed New Year in 2014!

Christmas-Background

X1M Pro has Arrived! Demo with WinLink RMS Express

My new X1M Pro finally arrived and this thing is tiny! I have been having so much fun with this little rig. I bought it mainly for portable ops and digital and it looks like it is going to work very well for both.

So far I have used FLDIGI for PSK31 and Winlink RMS Express using the WINMOR TNC.

For more information visit the X1M Pro Yahoo group

Soundlink Interface – A combination of G4ILO and KH6TY’s interfaces.

RTL-SDR + SDR Radio + Funcube Sat = Fun!

With the recent record number of cubesat launches this month most  Amateur Radio enthusiasts been busy, myself included. There hasn’t been a better time to get into receiving these satellites. With the inexpensive hardware,  free software,  a ton of information and an active community it is “easy” and quite a thrill to get into this hobby.

I will focus on one satellite and one method of receiving and decoding in this post. There are so many ways to do this but I think this method is the least expensive and provides really good results.

You will need:

  1. RTL-SDR Dongle – E4000 or R820T model (I prefer the R820T model and they are the easiest to find now)
  2. SO-239 Pigtail adapter for the Dongle – This is great if you don’t want to cut and solder on a connector like I did!
  3. Zadig Drivers – For the RTL-SDR USB
  4. RTL-SDR Libraries for SDR-Radio.com V2 software – Choose SDR-Radio.com.RTLUSB-20130209.zip
  5. SDR-Radio.com V2 Software – I used the November 15th, 2013. Version 2.1 build 1571
  6. Good receiving antenna – 2m Yagi, Quadrifilar Helicoidal (QFH), Ground Plane,etc
  7. VB-Cable Driver – Virtual Audio cable (Center Column)- NOTE: Please Donate if you use it. As a bonus once you donate you get to download A and B Channels.  I am glad I did, the extra channels are nice to have!
  8. Funcube Dashboard Software
  9. Time to put it all together!

The total cost depending on what antenna you have or choose to build can be between $11 to whatever. Very minimum investment is required to receive and decode the funcube telemetry. This is fantastic for everyone, especially those on a budget that would like to experience this hobby first hand. If there are any educators reading this please take the time to show your students how much fun this can be. After all, it is part of the funcube mission!

I must say this as well: if you can afford to buy a Funcube Dongle, please do! It has better performance than the RTL-SDR and the money goes back to funding the funcube initiatives, like the Funcube satellites.

On to the setup:

I won’t go into detail on each and every install. Please read the pages I linked above for further instructions.

  1. Install SDR-Radio.com V2 Beta
  2. Plug RTL-SDR USB Dongle into computer
  3. Install ZaDig Drivers – NOTE: You may need to click Options and then List All devices. Select Bulk-in, (Interface 0) then click the replace Driver button.
  4. Extract and Copy the three  RTL-SDR DLL’s for SDR-Radio.com V2. NOTE: Overwrite existing files in the SDR-Radio.com’s directory and use the correct architecture!
  5. Install VB-Cable Virtual Audio Interface
  6. Install the Funcube Dashboard

Configuration:

 SDR-Radio.com V2:

  1. Launch SDRConsole (V2)
  2. On the Home Tab click the Select button from the Radio Group
  3. Click Definitions
  4. Click Search and Select the RTL SDR (USB) Option. If that option does not exist please check to make sure you copied the correct DLL’s into the SDR-Radio.com Program Folder
  5. Click Yes on the 1 Entry Found alert and Click OK
  6. Highlight the new entry (ezcap USB2.0 DVB-T/DAB/FM Dongle)
  7. Click Start
  8. Tune into a known frequency like the National Weather Service, this is required to adjust the PPM
  9. On the Home tab again, click the Radio Configuration button
  10. Click the + or – buttons to adjust the PPM. For example one of my dongles is +82 and the other is -133 so they vary widely.
  11. Click the more options selection and click the Internal AGC box. (You can experiment with this, mine worked better with it on)
  12. Select the frequency to 145.927 Mhz and set the Mode to SSB Data-U OR Wide-U, it doesn’t seem to matter
  13. Drag the bandwidth bar out to 24000 Hz to get full coverage. Note: This is required so you don’t have to “chase” the satellite because of the doppler effect, Funcube will always be in the bandwidth coverage. The Funcube Dashboard will Autotune on the transmission. (See screenshots)
  14. On the VFO-A box Click the Audio dropdown (next to the little audio speaker)
  15. Click the Playback device and Select VB-Cable for the output – Took me a while to find this one!!!
  16. For satellite data you can use whatever you are used to but the SDR-Radio’s works great. The current satellite number is 2013-066B and is likely to change to AO-73 in future TLE’s

Funcube Dashboard

NOTE: Be sure to register at the Funcube Data Warehouse to be able to submit your decoded packets automatically. If you ONLY want to decode and not send you can still use the software but not contribute. The more contributors the better though!

  1. Click File; then Settings
  2. Select the Audio Tab and select the Input Device as the Cable Output VB-Audio
  3. Click the Warehouse Tab and fill in your Site ID, Auth Code and click the Stream data to warehouse and Click Save
  4. Click Capture from the Menu and select Capture from Soundcard
  5. On the tuning panel change the High Value to 24000 and make sure the Auto Tune check box is checked
  6. You should see a sudden drop off in the tuning window around 24000 hz (See screenshots)

Final Thoughts:

This should get you started on receiving and sending the telemetry back to the funcube data warehouse. There are other great options out there like Analog receive to Souncard, Funcube Dongle but this seems to be the most inexpensive to get started. Now that you have your station setup for the Funcube you can go chase other sat’s as well!  There are other folks doing much more that I am and have great resources available. Please visit the links sections for more information.

I hope this helps you get started and most importantly have FUN!

 Other Links:

I/Q Data and Audio files:

  • Audio from 21 Nov 2013 0352 UTC Pass – Telemetry Only:

Download: 21-Nov-2013-3052UTC-Pass-Telemetry

  • Audio From the 24 Nov 2013 0436 UTC Pass during Active Transponder:

Download: 23-Nov-2013-232647 145.958300 MHz

Screen Shots:

Cubesat Launches

A record number of cubesats are set to launch this month. On November 19th twenty-eight CubeSats are set to launch aboard a Minotaur I rocket from Wallops Flight Facility in Virginia. Another group of cubesats are being launched November 21st from Dombarovsky, Russia.  This assortment of cubsats will offer transponders, beacons, telemetry and even a visual beacon (visible by binoculars and/or telescope). A little bit of everything for us to enjoy! Please see the links below to research each of the cubesats and launch information as there is just too much to duplicate here.

One of the most exciting satellites is the Funcube 1, which is has a software dashboard to decode telemetry and sat health data. The software and the latest news is available at their website. http://funcube.org.uk/.  You can use a SSB receiver or the ever popular Funcube and RTL DVR dongles to receive the transmissions and decode the telemetry.

Happy Sat-ting!

Useful Links:


D-RATS not just for D-Stars

After a trip to our County EOC with our local club president, KK4DKT (Marv) and a short demonstration I wanted to know more about D-Stars.  A quick search on the ‘net yielded some good information and a few youtube videos that explained the data portion of D-Stars Voice channel (DV).

Apparently there is a slow speed data channel that is transmitted on every  DV transmission. By slow I mean 1200 baud. Slow is not all bad though, you can transmit GPS data, text messages, small files and text bulletins. When in a communications blackout situation that slow speed link can be vital to emergency operations.

That lead me to the D-RATS software. D-RATS (D-STARS spelled backwards) is so named because it has a full featured set of communications tools to take advantage of the slow (or high) speed D-Stars data channels. The author of the software didn’t stop there though. He added support for network, AFSK 1200 using TNC’s or AGWPE compatible soundmodems, serial and the DV Dongle. In the package he includes the ability to setup your own “Rat”flector that acts like a hub for communications of all connected nodes or devices.

I was able to successfully use chat, QST (broadcast to all connected nodes), file transfer, email (to another connected node and winlink) and the connectivity tools using network and packet AFSK 1200. All without a D-Stars radio! I think it is an excellent piece of software that will enable connectivity using several different modes.

For example I setup my home station connected to my “Rat”flector and my PK-232 TNC. My mobile setup consisted of  a laptop with  the UZ7HO Soundmodem software, D-RATS and audio/PTT cables connected to a mobile radio.  As a  test I drove about five miles away and attempted to connect to the home station.  Success! Right-clicking in the stations sidebar and selecting “Ping all stations” brought up my home station and allowed me to connect in the Files sections. I initiated a test transfer of a Rich Text document (170KB) and began to drive home. The entire file transferred successfully in about 5 minutes while on the move. I was officially impressed.

Final thoughts: Don’t overlook D-RATS for personal, EOC, or club use. Even without a D-Stars system in place it has a lot of capability. When you do get that D-Star radio or your EOC implements it you will already be familiar with the functionality and operation. It is a great addition to your “Ham shack” or “to-go” kit.

Software Links:

Presentation explaining the Data Modes of D-Stars (Skip to 5:50):

N4JTC-R Echolink Node Decomissioned

I am sorry to report that the Bay County/Panama City, FL Echolink Node N4JTC-R is decommissioned as of May 1st, 2013. Our local club W4RYZ is looking for a replacement node to cover the area. Sorry for the inconvenience this will cause anyone.


PhoneSats and SDR Fun – Build your own Sat Station Cheap!

UPDATE: On 27 Apr 2013 the phonesats are officially silent. Use can still use this guide for many other current and future satellites.

Sidebar update 23 Nov 2013: Please visit my post on how to use RTL-SDR and SDR-Radio.com (V2) to listen to and decode the recently launched Funcube

———————————————-

The recent launch of the PhoneSats got my SDR and satellite juices flowing again. This time I decided to automate things because work seems to get in the way of my satellite listening fun. I found a combination that works great and incorporates FREE software and inexpensive hardware.

What you will need:

Software List

Hardware List

  • Computer – A fairly decent powered computer or laptop is needed to run HDSDR, DDE and Orbitron
  • Cheap Realtek RTL2832U USB DVB Dongle with the E4000 or R820T tuner chipsets
    • Sources:
    • NooElec – Best Price Fast shipping guaranteed compatible chipset R820T
    • Amazon.com – It’s Amazon!
    • Aliexpress – Slow from China shipping but great prices
  • Antenna

Putting it all together:

Please visit the Phonesat.org page for the latest information on the cubesats. NOTE: They are not solar powered and are expected to fail about a week after deployment which occurred on April 21st 2013.

Antares Launch Video – As you can see all systems were nominal and deployed nominally. 🙂

Installation:

  1. Install the Driver with Zadig  – DO NOT install the OEM driver that comes shipped with the device. Use Zadig only. Instructions HERE
  2. Install HDSDR using the defaults
  3. Download the ExtIO_RTL.dll file and place the file in the HDSDR program location (C:Program FilesHDSDR or C:Program Files (x86)HDSDR)
  4. Download and Install Orbitron
  5. Download the MyDDE driver for Orbitron
  6. Unzip the MyDDE driver and place the mydde folder in the Orbitron program directory (C:Program FilesOrbitron or C:Program Files (x86)Orbitron)
  7. Download the PhoneSAT TLE’s and place them in a directory of your choice
  8. Download and unzip UZ7HO’s Sound Modem

Configuration:

  1. Setup Orbitron first by setting your Home location. It will use your Grid square to translate to the lat/long coordinates.
    • Click the Load TLE button and browse to the PhoneSat.txt file. Select the PHONESAT satellite in the Satellites list.
    • Select the Rotor/Radio tab. Input the Downlink frequency, for Phonesats it is 437.425 Mhz.
    • Click the Driver drop down box and select MyDDE
    • Click the Activate button. This will prompt you to browse for the driver. Go to the folder you copied it to under the program directory (C:Program FilesOrbitronmydde or C:Program Files (x86)Orbitronmydde)
    • The MyDDE status window should now be displayed with Satellite data
  2. Launch HDSDR and confirm the  USB Dongle is functioning.
    • Left-click the EXTIO button and turn on the Tuner AGC and RTL AGC.
    •  NOTE: I ran into an issue that required me to launch HDSDR with “Run as Administrator” or I would end up with a ExtIO DLL not active error. Right-click on the HDSDR icon and select “Run as Administrator”. If you want the settings to be persistent you check the run as administrator box located under the compatibility tab while in the shortcut properties.
    • Click on the Options button then Select DDE Client. Set the format to Orbitron and the Sync Type to Tune. If you would like to record the Satellite passes automatically check the “Record all satellite passes” box.
    • Click the Manual connect button and it should give you a green connection successful message.
    • The TUNE indicator on HDSDR should be synced with the Doppler readout in Orbitron. If the Record all satellites option was checked when a satellite comes into view at AOS it will automatically record based on the options set in HDSDR.
  3. Launch UZ7HO’s Sound Modem program
    • In the Modem settings change the modem type to VHF AX.25 1200 baud.
    • Select your input sound device to either Stereo Mix if you have one or you can download VAC (Virtual Audio Cable)
    • Another option would be to use a separate computer or use a Stereo cable loopback. (Actual audio cable looped back to input)

Recording options:

To access the record options, right-click on the red record button. There are a three ways to record on HDSDR: Full RF, IF RF and AF. Full RF will give you the largest file size but capture the entire RF session to go back and replay and analyze. If you are only interested in the audio portion pick the AF recording option for the smallest file size. I like to record the Full RF to see what I missed or see how far the Doppler settings were off. In the case of the Phonesats you can see all three satellites clearly at different frequencies although they are all transmitting on 437.425 Mhz due to Doppler shift. Very cool to see it visually!

Troubleshooting:

  • If you are running Windows 7/8 Pro you may need to add User modify rights to the Program directories (C:Program FilesHDSDR and C:Program FilesOrbitron). You can install the software in a Non-Program Files location (e.g. User Documents) to avoid this step.
  • Use “Run as administrator” when launching HDSDR
  • Be sure no other programs are running in the background causing your system to slow down. The SDR decoding can be CPU intensive.
  • Make sure EXTIO_RTL.dll is located in the program directory C:Program FilesHDSDR or C:Program Files (x86)HDSDR

I hope you enjoy some satellite listening!

DVB Dongle makes a great VHF UHF SDR Radio

Updated on: July 16, 2012

SDR Radios are  the latest and greatest things to come along in Ham Radio since solid state was invented.  Ok, well that may be a stretch, but it certainly has made some incredible advances in SWL and Ham radio.  Thanks to the ingenuity of some super smart people we can all enjoy an inexpensive alternative to some of the VHF and UHF dongles out on the market. Interesting enough a product that was meant to be a DVB-T, DAB and DAB+ tuner actually makes a great SDR Radio!

There is a specific model chipset that is required to utilize the SDR tuner. It requires the e4000 tuner and the Realtek RTL2832 chipset. Unfortunately on my first try I received an upgraded DVB dongle that had a newer chipset that is not compatible with any SDR software.  I was a little disappointed at first but I am using it for local ATSC channels for my PC so no big loss. I later found that Reddit maintains a list of compatible tuners. I ended up ordering a Newsky TV28T  from Aliexpress.com which had the correct tuner/chipset and worked perfectly. I was surprised at how well it actually worked, I was receiving the NOAA weather radio broadcast, our local airport tower communications, APRS,  neighborhood weather stations, and some FRS chatter.  I originally wanted to use it for the reception of Amateur radio satellites/Cubesats which I am sure it will work well for but I haven’t had a chance to try it. Pretty amazing stuff considering it was less than $30 shipped.

Using the Windows software was the easiest way to get this SDR to tick. I enjoy using Linux but I was already used to using HDSDR and wanted a “quick fix” for my SDR listening enjoyment. Fortunately there is a fairly straight forward way to use Windows and the DVB dongle. I followed instructions such as those on the Ham Radio Science Blog and was up and running in no time. I won’t list all the steps here for the Windows setup as this webpage does a good job at outlining all the steps.

After using the Windows setup for a while I decided to give the Linux offerings a try. It wasn’t that all that difficult after putting all the pieces together.

If you would like to give Linux a try here a few links to hopefully make it easier for you:

Components you will need for LINUX:

  1. GNURadio Package – I highly recommend the build script  to help install the dependencies and compile all the necessary components.
  2. The Linux RTL-SDR driver (not needed if using the script from step 1)
  3. gr-osmosdr Package (also not needed if using the script from step 1)
  4. GQRX (optional but recommended, nice GUI interface) – Be sure to read the compile instructions

Also see an excellent post on how to use BackTrack and a offline package.

Windows Software

Some very helpful pages:

  • AB9IL Blog – More information about the RTL DVB-T tuner
  • SuperKuh – Many links and info on the  Realtek RTL2832U/Elonics E4000

Important Notes: My DVB dongle was off-frequency by 21khz but the ExtIO plugin for HDSDR makes it easy to correct for the frequency error. You can right-click the ExtIO button on the HDSDR interface to bring up the Tuned frequency adjustment.  Left-clicking the same button brings up the normal ExtIO options. On the Linux side of things GQRX has an option to adjust the ppm value for frequency adjustment. To access the option click View, then Input Controls on the menu bar. A Tab will appear under the Squelch control labeled Input Controls. From there you can correct for frequency errors. I used my APRS signal and the built-in 1200 AFSK Decoder dial it in.

Screenshot-Gqrx v2.1-git-76-g781b4441 - ezcap USB 2.0 DVB-T-DAB-FM dongle-2 Screenshot-Gqrx v2.1-git-76-g781b4441 - ezcap USB 2.0 DVB-T-DAB-FM dongle Screenshot-AFSK1200 Decoder